What is Waterproof Silicone Sealant and How to Use It?
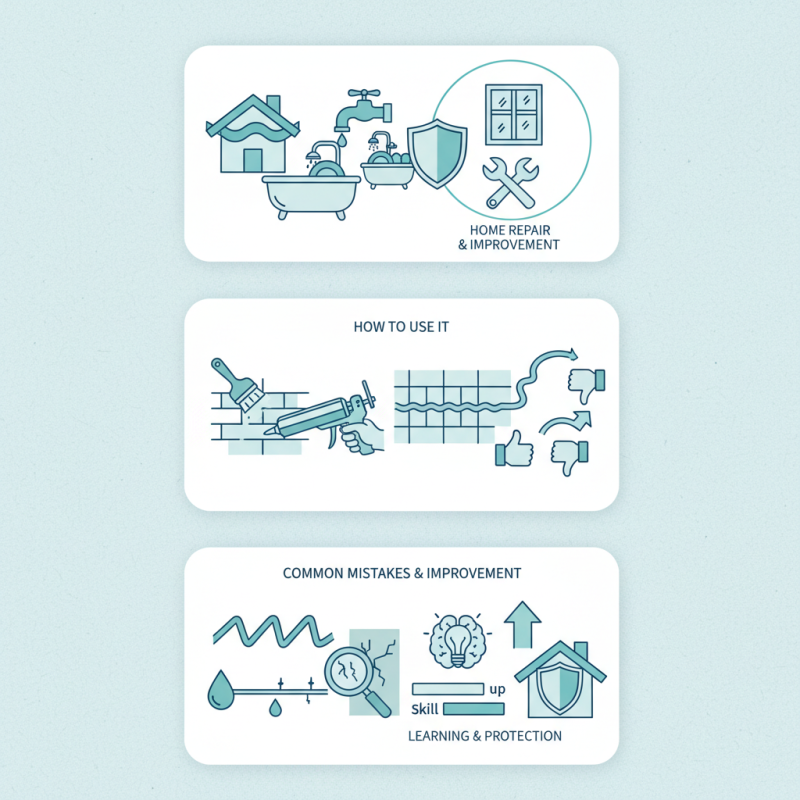
Waterproof Silicone Sealant is a versatile and essential product for anyone engaging in home repair or improvement projects. This sealant creates a durable, watertight barrier, making it ideal for areas exposed to moisture. It acts effectively in preventing leaks, especially in bathrooms, kitchens, and around windows. Using Waterproof Silicone Sealant helps protect your home from water damage.
To utilize this sealant properly, several steps need consideration. The first step is to ensure a clean surface for better adhesion. Old caulking must be removed entirely. The application will also require the right tools. A caulking gun can make the process smoother. When applying, you should create even beads. Imperfections can occur; however, they can lead to better techniques in future projects.
Although Waterproof Silicone Sealant offers numerous benefits, mistakes happen. Some users might apply it too thickly or unevenly. This can result in unsightly gaps or poor sealing. Recognizing these errors can foster improvement. By understanding Waterproof Silicone Sealant better, one can enhance their skills and create lasting, waterproof solutions. Embracing this learning curve can lead to effective home maintenance.
What is Waterproof Silicone Sealant?
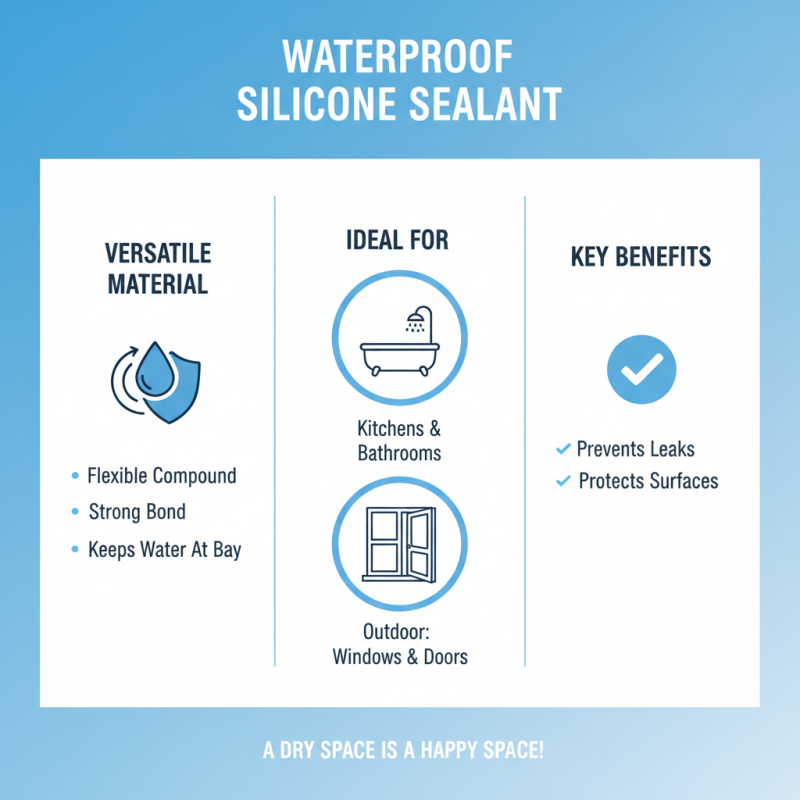
Waterproof silicone sealant is a versatile material used in various projects. It's a flexible compound that forms a strong bond, keeping water at bay. This sealant is ideal for wet areas, like kitchens and bathrooms. It can also be used outdoors on windows and doors. When applied correctly, it prevents leaks and protects surfaces.
Applying waterproof silicone sealant may seem easy, but it has its challenges. Surface preparation is critical. Clean the area thoroughly before application. Any dirt or moisture can reduce adhesion. Keep your working area organized. Measure the amount needed carefully. Over-application can lead to messy results.
Tips: Use painter's tape to create clean edges. This helps to avoid excess sealant on your surfaces. After applying, smooth it out with a wet finger or a tool. This can improve the appearance and effectiveness of the seal. Remember, practice makes perfect. Mistakes can happen, but each project teaches valuable lessons.
Types of Waterproof Silicone Sealant Available
Waterproof silicone sealants are essential for many construction and repair projects. They provide a durable, flexible barrier against moisture. Different types of waterproof silicone sealants exist, each tailored for specific applications. Choosing the right one can enhance durability and effectiveness.
One common type is the general-purpose silicone sealant. This type is versatile for indoor use. It adheres well to various surfaces and remains flexible over time. However, it may not withstand extreme weather conditions. For outdoor applications, specialized weather-resistant sealants are available. These sealants often contain additives that enhance UV resistance and temperature tolerance. Industry reports suggest that weather-resistant sealants can extend the lifespan of joints by up to 50% in harsh environments.
Another type is high-temperature silicone sealant. This product is crucial for applications involving heat exposure. Common uses include automotive and industrial settings. While effective, improper application can lead to reduced performance. A report by a leading construction materials organization highlighted that improper application can compromise the seal, leading to potential leaks. Recognizing these subtleties is key to using waterproof silicone sealants effectively. Each product has its strengths, but awareness of limitations is also important.
What is Waterproof Silicone Sealant and How to Use It? - Types of Waterproof Silicone Sealant Available
| Type of Sealant |
Color Options |
Cure Time |
Temperature Resistance |
Best Uses |
| General Purpose Silicone |
Clear, White, Grey |
24 hours |
-60°C to 180°C |
Bath and kitchen fixtures, windows |
| Marine Silicone |
Clear, Black |
24-48 hours |
-40°C to 120°C |
Boat and marine applications |
| High-Temperature Silicone |
Red, Black |
1 hour |
-60°C to 300°C |
Automotive, industrial applications |
| Anti-Mold Silicone |
White, Clear |
24 hours |
-20°C to 120°C |
Wet areas, bathrooms, kitchens |
Key Properties and Benefits of Using Silicone Sealant
Silicone sealant is widely recognized for its impressive properties. It boasts high flexibility, allowing it to withstand temperature fluctuations. Its durability under moisture makes it ideal for various applications.
According to a report by the American Chemistry Council, silicone sealants can last over 20 years without degrading. This longevity is one reason why many construction and repair projects rely on it.
Another key benefit is its resistance to mold and mildew. Silicone does not provide a food source for these unwanted elements. This means fewer maintenance issues down the line.
Many professionals appreciate this as it contributes to healthier living environments. Experts suggest checking the label for specific applications, as not all silicone sealants perform well in every situation.
Tips: Ensure the surface is clean and dry before application. This will enhance adhesion and longevity. Using a caulking gun helps control the amount applied, reducing waste.
Consider testing the sealant on a small area first. This helps you gauge compatibility with the surface.
It's crucial to reflect on the curing time. While some products set quickly, others may take longer to fully cure. Over-application can lead to mess and longer waits for drying.
It’s better to apply in small sections. Regularly assess the area for any signs of wear or damage to the seal. Instead of assuming it lasts indefinitely, check occasionally.
Step-by-Step Guide on How to Apply Waterproof Silicone Sealant
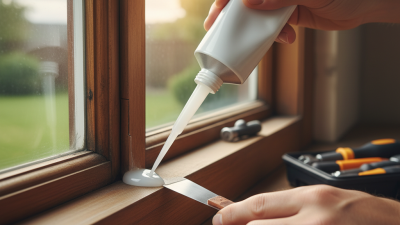
Applying waterproof silicone sealant can seem daunting, but it doesn’t have to be. Start by gathering your tools. You will need a caulking gun, a utility knife, and rubbing alcohol for cleanup. Make sure the surface is clean and dry. According to industry reports, a clean surface increases adhesion by up to 50%. Removing old sealant is crucial. Use the utility knife to scrape it off carefully.
Next, cut the silicone tube at a 45-degree angle. Puncture the inner seal. Load it into the caulking gun. Ensure even pressure while applying the sealant. Move steadily, filling the gap in one go. Common mistakes include uneven pressure or stopping mid-application, leading to leaks. Always smooth out the sealant using a wet finger for a clean finish. This step helps seal the edges effectively.
Don’t rush the drying process. While some silicone products cure in 24 hours, full adhesion can take a week. Humidity and temperature greatly affect drying times. Monitor these conditions for best results. Always refer to the manufacturer’s guidelines for safety and best practices. Remember, practicing on a scrap surface can help prevent mishaps.
Common Applications and Uses of Waterproof Silicone Sealant
Waterproof silicone sealant is versatile and essential for various applications in homes and industries. It offers excellent adhesion, elasticity, and resilience against moisture. Common uses include sealing windows, doors, and roofs. In bathrooms and kitchens, it prevents water leaks around sinks and bathtubs. Many homeowners rely on it for its durability and effectiveness.
When applying silicone sealant, surface preparation is crucial. Clean the area thoroughly to ensure proper adhesion. Uneven surfaces can lead to failure, so take your time. Avoid rushing the curing process; let it set as instructed. Mistakes happen if you don’t follow the guidelines.
Look for areas needing maintenance in existing seals. Sometimes, a simple touch-up can make a significant difference. Inspect regularly for wear, especially in high-humidity areas. While it works well, the product may sometimes peel or crack after extended use. It's necessary to be prepared for touch-ups as part of routine home care.