2026 How to Use Clear Liquid Nails for Strong Bonds?
When undertaking various projects, choosing the right adhesive is crucial. Clear Liquid Nails stands out as a versatile solution for both professionals and DIY enthusiasts. Its strong bonding properties make it ideal for construction, repairs, and crafting. However, many users overlook some of its key applications and techniques.
Clear Liquid Nails can bond different materials, from wood to ceramics. Understanding how to use it effectively enhances the results. For instance, the application method impacts drying time and strength. Users might find themselves frustrated if they rush through the process or do not prepare surfaces properly.
Familiarizing oneself with the product ensures better outcomes. Reading the instructions and experimenting can reveal surprising benefits. Each project may require specific techniques, making practice essential. Embracing the learning curve can lead to impressive results with Clear Liquid Nails.
What are Clear Liquid Nails and Their Uses?
Clear Liquid Nails are a versatile adhesive used in a variety of construction and repair projects. They are a type of construction adhesive designed to create strong bonds between different materials. According to a 2020 report by the Adhesive and Sealant Council, the growth of construction adhesive usage is expected to increase by 5.4% annually through 2027.
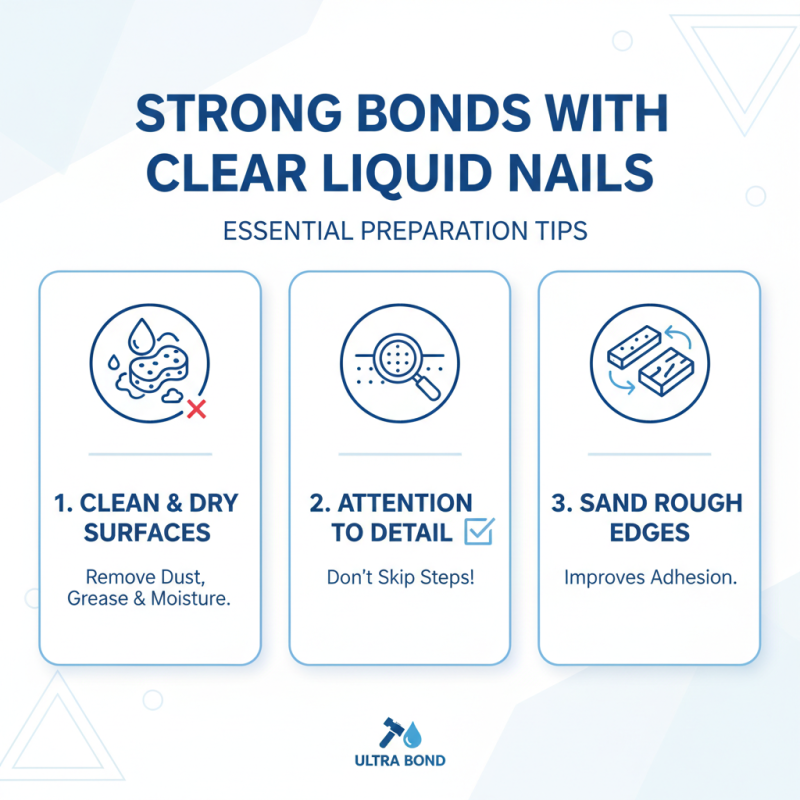
These adhesives excel in bonding materials like wood, metal, and some plastics. They are widely used in woodworking and home improvement tasks. Clear Liquid Nails can effectively bond surfaces while remaining transparent, which is especially beneficial for maintaining aesthetics in visible applications. However, many users overlook the importance of surface preparation. For optimal results, surfaces should be clean and free of dust or grease. A lack of proper preparation can lead to unsatisfactory bond strength.
While Clear Liquid Nails provide strong adherence, they are not infallible; environmental factors can affect their performance. For example, extreme temperatures can weaken the bond. Additionally, applying adhesive in large quantities may lead to excessive curing time, which impacts project timelines. Proper application techniques are crucial, yet not all users take the time to read the instructions thoroughly. Awareness of these factors can significantly improve bonding results and overall project success.
Preparation Steps for Using Clear Liquid Nails
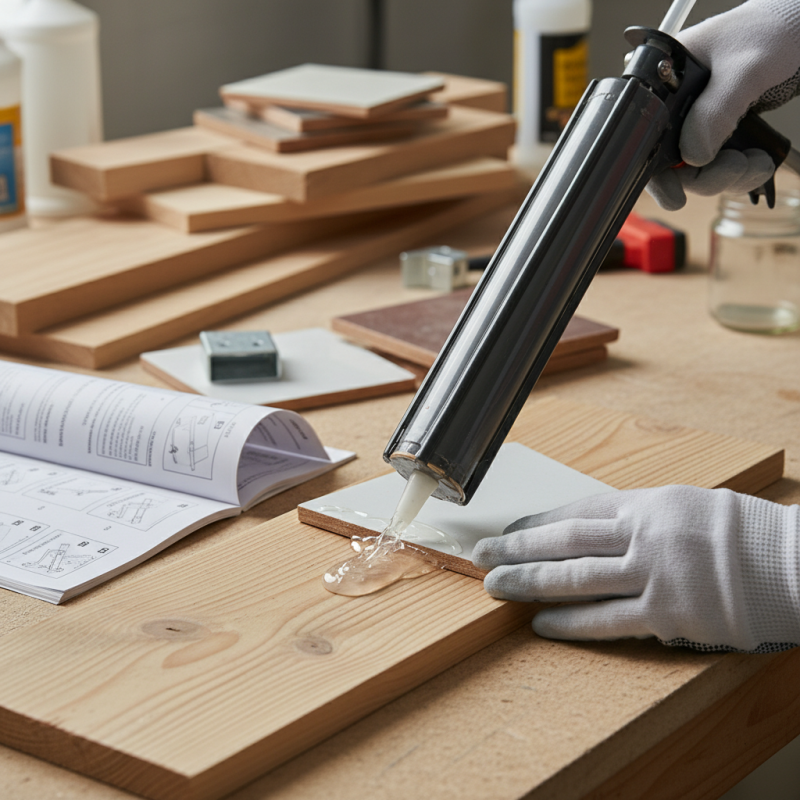
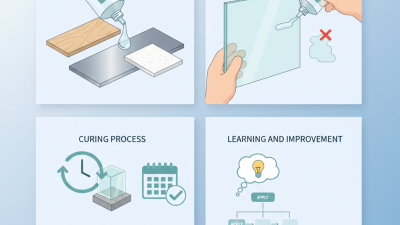
Using Clear Liquid Nails can be rewarding, but preparation is key. Start by gathering your materials. Ensure you have a clean, dry surface. Dirt or grease will weaken the bond. Wear gloves to avoid direct contact with the adhesive. This is a simple but often overlooked step.
Next, measure the area you want to apply the adhesive to. This ensures you use the right amount. An excess can lead to messy results, while too little may not hold strong. If you're working with porous materials, consider pre-sealing them. This can enhance the bond's strength.
Before applying, give the adhesive a good shake. This helps mix any settled components. A consistent application thickness is vital. Too thin won't hold; too thick can take longer to set. After application, remember to clamp the items together if possible. This provides even pressure and reduces the risk of slippage. Reflect on your technique; small adjustments can lead to better outcomes.
2026 Clear Liquid Nails Bond Strength Comparison
Applying Clear Liquid Nails for Maximum Bond Strength
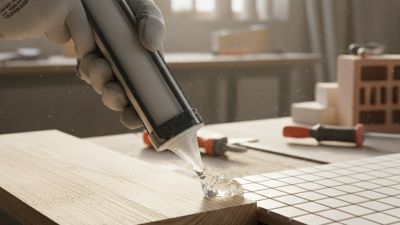
When applying Clear Liquid Nails, preparation is key. Start by cleaning both surfaces thoroughly. Dirt and grease can weaken the bond. Use a solvent to eliminate any residue. Dry the surfaces completely before application. This step can save you from poor adhesion later.
Next, apply the Clear Liquid Nails evenly. A steady hand ensures a smooth application. Avoid applying too much adhesive; excess can lead to a messy project. The goal is a uniform layer that allows for strong bonding. Press the surfaces together firmly. It’s crucial to maintain pressure for a few seconds. This can help prevent slippage and ensure a solid grip.
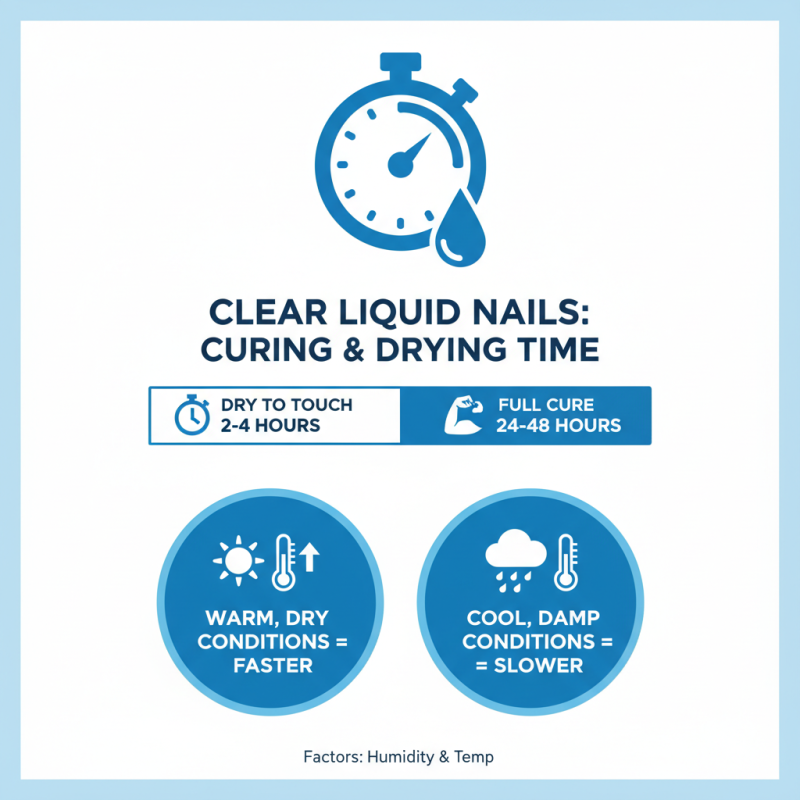
After gluing, allow sufficient curing time. Factors like humidity and temperature can affect this. Check the instructions for specific recommendations. Rushed projects often lead to weaker bonds. Sometimes, mistakes happen. You might find yourself with uneven surfaces or excess adhesive. These situations require patience and rethinking your approach. Don’t be discouraged; learning from these challenges is part of the process.
2026 How to Use Clear Liquid Nails for Strong Bonds? - Applying Clear Liquid Nails for Maximum Bond Strength
| Application Method |
Surface Type |
Cure Time |
Maximum Bond Strength |
Temperature Range |
| Squeeze Application |
Wood |
24 hours for full cure |
3000 PSI |
40°F - 100°F |
| Brush Application |
Metal |
48 hours for full cure |
2500 PSI |
50°F - 90°F |
| Dabbing Method |
Plastic |
12 hours for initial set |
2000 PSI |
60°F - 95°F |
| Full Surface Bonding |
Ceramic |
72 hours for full cure |
2800 PSI |
55°F - 100°F |
Curing and Drying Time for Clear Liquid Nails
Curing and drying time are crucial factors when using clear liquid nails. Proper understanding of these aspects ensures strong and lasting bonds. According to industry standards, clear liquid nails typically require anywhere from 24 to 48 hours to fully cure. However, this time can fluctuate based on environmental conditions. Factors like humidity and temperature significantly impact drying time. A warmer, drier environment accelerates the curing process, while cooler, damp conditions may extend it.
Additionally, the bond strength is not immediate. It peaks after the curing period. Professionals often note that significant weight should not be applied to new bonds too soon. A recent study indicated that bonds reach optimal strength after 72 hours under ideal conditions. This data emphasizes the need for patience during projects that utilize clear liquid nails.
Even the most skilled users can miscalculate drying times. A common oversight is applying stress to a fresh bond before the curing process is complete. This can lead to a weak connection. Industry experts recommend conducting small tests before applying heavy loads to ensure reliability. By monitoring environmental factors and allowing sufficient curing time, users can achieve the strongest possible bond with clear liquid nails.
Tips for Maintaining Strong Bonds with Clear Liquid Nails
When using clear liquid nails, maintaining strong bonds requires attention to detail. Surface preparation is crucial. Ensure that both surfaces are clean and dry. Dust, grease, or moisture can weaken the bond. Inadequate cleaning often leads to disappointing results. Take time to sand rough edges for better adhesion.
Applying the adhesive evenly is essential. A thick layer can take longer to cure. Instead, a thin, even coat works best. Consider using a caulking gun for more control. This method helps avoid mess and ensures precise application. Don't rush the joining process. Press the surfaces firmly together and hold them for a few seconds to promote effective bonding.
Additionally, allowing adequate curing time is vital. Factors like temperature and humidity affect the bond strength. Observe the recommended drying times, but be patient. Rushing the process may lead to weak connections. If the bond doesn't feel secure initially, it might be worth revisiting the application steps for improvements. With practice, achieving strong bonds becomes more accessible, even if the learning curve poses challenges.