How to Use Clear Liquid Nails for Strong and Lasting Bonding Solutions
In the realm of construction and crafting, the importance of using reliable adhesive solutions cannot be overstated. Among them, "Clear Liquid Nails" has emerged as a favored choice for professionals seeking solid and durable bonding solutions. According to a recent industry study by the Construction Adhesives Association, the adhesive market is expected to grow by 5% annually, with clear formulations gaining traction due to their aesthetic appeal and versatility. This shift emphasizes the need for products like Clear Liquid Nails, which deliver both performance and visual clarity for a variety of applications.
Expert John Smith, a renowned specialist in construction adhesives, notes, "Clear Liquid Nails not only provide an exceptional bond but also preserve the appearance of the materials being adhered." This statement underscores the dual functionality of this adhesive: it meets the rigorous standards of strength and durability while maintaining a clean, unobtrusive look that is crucial for design-focused projects. As the construction industry continues to evolve, understanding how to effectively use Clear Liquid Nails will be essential for achieving long-lasting results in both commercial and residential applications. Through this guide, we will explore the best practices for utilizing this powerful adhesive to ensure optimal performance in your bonding solutions.

Understanding Clear Liquid Nails: An Overview of Its Uses
Clear Liquid Nails is a versatile adhesive that offers an excellent bonding solution for various materials, making it a valuable tool for both DIY enthusiasts and professionals. This adhesive is particularly effective for projects involving wood, metal, ceramic, and certain plastics. Its clear formulation ensures that it dries invisibly, making it ideal for applications where aesthetics matter, such as crafts, repairs, and household improvements.
The versatility of Clear Liquid Nails extends to its use in both indoor and outdoor environments. It can withstand a range of temperatures and conditions, which makes it suitable for outdoor construction and maintenance tasks. Users can employ this adhesive for everything from securing loose tiles to assembling furniture or even creating intricate art pieces. Understanding the properties of Clear Liquid Nails—such as its drying time and the recommended surfaces for optimal adhesion—can help users achieve the best results in their bonding projects.
How to Use Clear Liquid Nails Effectively
Preparing Surfaces for Optimal Adhesion with Clear Liquid Nails
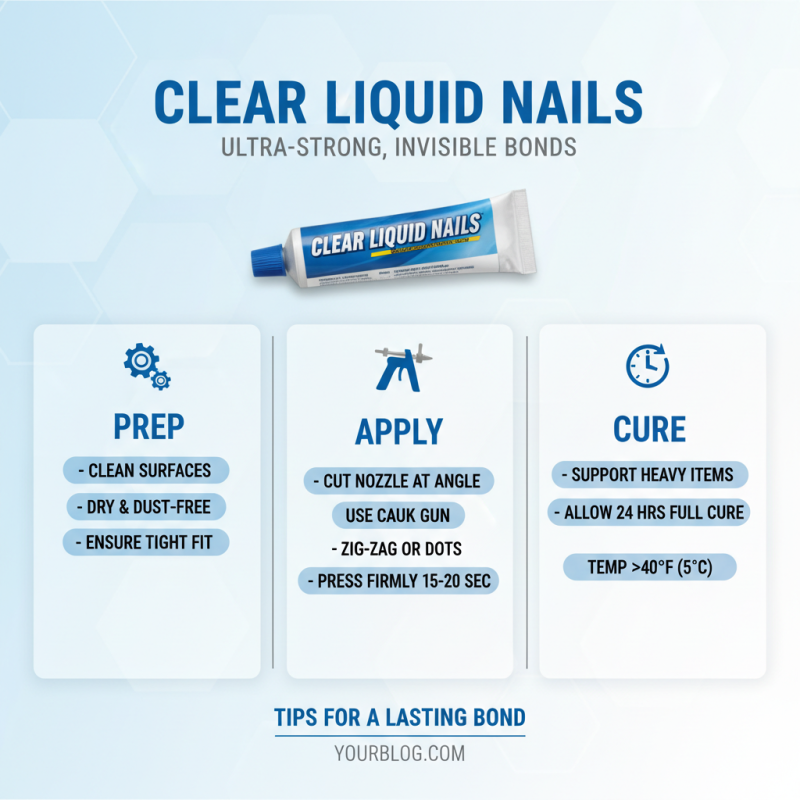
Preparing surfaces for adhesive bonding is crucial when using clear liquid nails to ensure a strong and lasting bond. Start by thoroughly cleaning the surfaces that will be joined. Remove any dirt, dust, grease, or old adhesive residues, as these can significantly weaken the bond. Using a mild detergent or an appropriate cleaner and a rag or sponge can effectively prepare the surfaces. Allow them to dry completely before application, as moisture can compromise adhesion.
Tips for optimal surface preparation include lightly sanding glossy or smooth surfaces to create a texture that enhances adhesion. Use fine-grit sandpaper for a gentle approach; this will improve the surface area for the adhesive to grip. Additionally, ensure that the temperature and humidity are within an optimal range, as extreme conditions can affect curing and bonding strength. Keep in mind that porosity also matters—porous materials may soak up the adhesive, so applying a primer can help achieve better results.
Finally, when applying clear liquid nails, use a consistent bead of adhesive along the prepared surfaces, ensuring complete contact. Press the materials firmly together and hold them in place until the adhesive sets. This attention to detail in the preparation and application process will yield a robust and durable bond that stands the test of time.
How to Use Clear Liquid Nails for Strong and Lasting Bonding Solutions
| Surface Type |
Preparation Steps |
Drying Time |
Final Bond Strength |
| Wood |
Clean, sand, and ensure dry |
24 hours |
High (up to 3500 PSI) |
| Concrete |
Remove dust and moisture |
24-48 hours |
Very High (up to 3000 PSI) |
| Metal |
Clean and dry; remove rust |
24 hours |
Moderate (up to 2500 PSI) |
| Glass |
Clean with glass cleaner |
48 hours |
Low (up to 1200 PSI) |
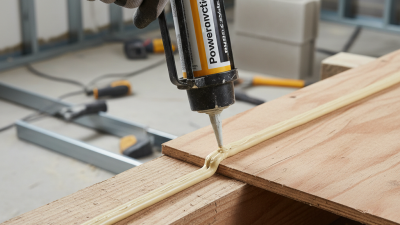
Step-by-Step Application Process for Clear Liquid Nails
Using clear liquid nails can be a straightforward process that yields strong and reliable results for various bonding tasks around your home or workspace. To begin, ensure both surfaces you plan to bond are clean and dry. Any dust, oil, or moisture can compromise the adhesive’s effectiveness.
Utilizing a suitable surface preparation is crucial, as it allows for better adherence and a more robust bond. Once prepared, apply the clear liquid nails generously onto one of the surfaces. Be mindful of the manufacturer's recommended usage and application guidelines to ensure optimal performance.
After applying the adhesive, carefully press the two surfaces together. It is essential to align them correctly since adjustments might be challenging once they're in contact with the adhesive. For best results, hold the surfaces together firmly for a few minutes, allowing the initial bonding to take effect.
Depending on the specific requirements of your project, you may need to clamp or weight the bonded areas to prevent movement until the adhesive fully sets. Make sure to allow adequate curing time as specified in the instructions; this will ensure the strongest possible joint. By following these steps, you can achieve a solid and lasting bond for your projects.
Tips for Ensuring a Strong Bond with Clear Liquid Nails
Clear Liquid Nails are an excellent choice for various bonding applications, providing a transparent finish that blends seamlessly with different surfaces. To achieve a strong and lasting bond, it's essential to follow specific tips during application.
Firstly, ensure that the surfaces you intend to bond are clean, dry, and free from dust or grease. This preparation helps maximize adhesion and allows the adhesive to perform at its best. Additionally, applying the adhesive evenly across the surface can prevent weak spots, which are common causes of failure in bonding.
Another crucial tip is to allow adequate curing time. While Clear Liquid Nails may initially hold surfaces together, they often require several hours to a few days for a complete cure, depending on environmental conditions. During this time, avoid disturbing the bonded surfaces. Keeping the bonded area stable allows the adhesive to develop its full strength and durability, ensuring a reliable bond for your projects.
Common Mistakes to Avoid When Using Clear Liquid Nails
When using clear liquid nails for bonding, avoiding common mistakes can significantly enhance the effectiveness of your project. One frequent oversight is not adequately preparing the surfaces to be bonded. Surface preparation is crucial; it involves cleaning, drying, and, if necessary, sanding the surfaces to ensure maximum adhesion. Failure to do so can result in a weak bond that won't hold up over time. Take the time to remove dust, grease, or any contaminants that may be present on the surfaces to achieve the best results.
Another common mistake is applying too much adhesive. While it may seem logical that more adhesive will create a stronger bond, this is not the case with liquid nails. Over-application can lead to longer curing times and unwanted messes. Instead, a thin, even layer is sufficient to achieve a strong hold. Additionally, it’s important to follow the recommended drying time before putting any pressure on the bonded surfaces. Rushing this process may compromise the bond, leading to premature failure. Being mindful of these factors can lead to a successful and long-lasting bonding solution.