How to Use Clear Liquid Nails for Strong Adhesive Bonds?
In construction and DIY projects, choosing the right adhesive is crucial. "Clear Liquid Nails" is a popular solution for many due to its strong bonding capabilities. According to a report by the Adhesive and Sealant Council, the global adhesive market is projected to reach $50 billion by 2024, highlighting the demand for effective bonding options.
Renowned industry expert, Dr. Emily Thompson, states, "Using Clear Liquid Nails properly can enhance the durability of your projects." This emphasizes the importance of understanding and applying the product correctly. The versatility of Clear Liquid Nails allows it to bond wood, ceramics, and many other materials.
However, not every user achieves the best results. Several factors can affect its efficacy. For instance, surface preparation is often overlooked. Many users underestimate the significance of cleaning surfaces, which can lead to weak bonds. It's essential to reflect on these aspects to maximize the benefits of Clear Liquid Nails and ensure strong adhesive bonds.

Understanding Clear Liquid Nails and Its Applications
Clear Liquid Nails are versatile adhesives well-known for their strong bonding capabilities. This type of adhesive is particularly effective for both indoor and outdoor applications. According to industry data, more than 60% of contractors prefer using clear adhesives for projects requiring transparency and durability. Clear Liquid Nails can bond various materials, including wood, metal, and ceramics. This versatility makes them suitable for diverse tasks, from home repairs to large-scale construction.
The application process is straightforward but requires attention. Proper surface preparation is crucial. Surfaces should be clean and dry to achieve optimal adhesion. Even slight dust can weaken the bond. It's interesting to note that the initial cure time can vary drastically, depending on environmental conditions. Humidity, for instance, can extend curing time significantly. Many users overlook these details, leading to less effective results and, ultimately, dissatisfaction.
Despite their strengths, challenges remain. Users sometimes experience issues with uneven surfaces. This can hinder the adhesive's performance. Data indicates that about 30% of users report difficulty in achieving a perfect bond under such conditions. Reflecting on these challenges can lead to better application practices and improved outcomes in future projects.
Preparation of Surfaces for Optimal Adhesion
Preparing surfaces is essential for achieving optimal adhesion when using clear liquid nails. Start by cleaning the surfaces thoroughly. Dust, grease, and dirt can prevent a strong bond. Use a damp cloth or a mild cleaning solution. Allow the surfaces to dry completely before proceeding. This step is vital; any moisture can compromise adhesion.
Next, consider the texture of the surfaces. Smooth surfaces may not hold the adhesive as well as rough surfaces. Sanding or scoring the area can help. However, don’t overdo it. Uneven surfaces might lead to weak spots in the bond. Apply even pressure when connecting pieces, ensuring a solid contact area. Check for any air bubbles or gaps once the adhesive is applied, as these can detract from the strength of the bond.
Surface Preparation for Optimal Adhesion with Clear Liquid Nails
Step-by-Step Instructions for Using Clear Liquid Nails
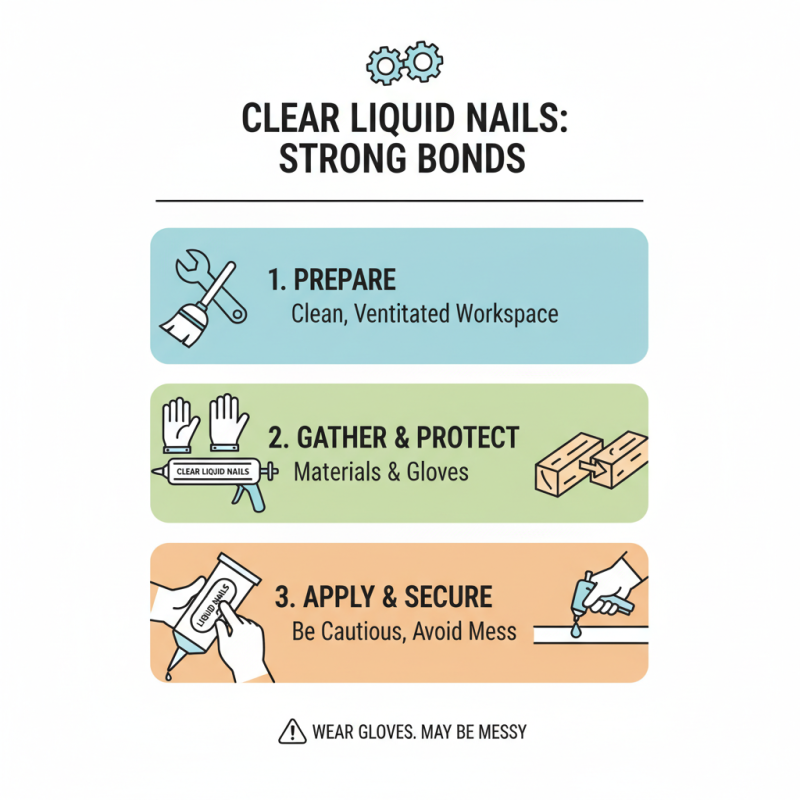
Using clear liquid nails can create strong adhesive bonds for various projects. Start by preparing your workspace. Make sure the area is clean and well-ventilated. Gather all materials you’ll need for the task. Wear gloves for safety. It can get messy, so be cautious.
Apply the adhesive to one surface. Use a zigzag pattern for maximum coverage. It’s important not to use too much, as excess may ooze out. Press the two surfaces together firmly. Hold them in place for a few seconds. For thicker materials, you might need to weight them down. Give the glue at least 24 hours to cure properly.
While working, reflect on your technique. Mistakes may happen, like getting glue on unwanted surfaces. Clean this up immediately with a solvent. Sometimes, the bond may not hold as expected. This could be due to insufficient application or dirty surfaces. Be prepared to rethink your approach if this occurs.
Safety Precautions When Working with Adhesives
When working with adhesives, safety should always be a priority. Many people underestimate the risks involved. According to the Occupational Safety and Health Administration (OSHA), over 150,000 workers are affected by chemical exposure each year. This highlights the importance of wearing proper protective gear when using adhesives like clear liquid nails.
Use gloves to protect your hands. Skin contact can lead to irritation or allergic reactions. A report from the
National Institute for Occupational Safety and Health (NIOSH) suggests that proper gloves can prevent over
90% of skin exposure risks. Consider wearing
eye protection. Adhesives can splatter and cause serious injuries. Even a small drop can lead to discomfort and long-term issues.
Ensure the workspace is well-ventilated. Good airflow minimizes inhalation risks. Many adhesives release volatile organic compounds (VOCs) that can harm your respiratory system. A study indicated that prolonged exposure can lead to chronic health problems. Keep children and pets away from your work area. They may inadvertently come into contact with harmful substances. Always store adhesives safely, following vigilance against potential spills or leaks.
Safety is not just a checklist; it requires ongoing awareness and attention.
Tips for Achieving the Best Bonding Results
When using clear liquid nails, achieving a strong bond requires attention. Start by cleaning the surfaces that need to be bonded. Dust and grease can weaken the adhesive. A clean surface promotes better adhesion and long-lasting results.
Tips for achieving the best bonding results include applying the adhesive evenly. Uneven application can lead to weak spots. Use a good amount, but don’t overdo it. Excess adhesive can squeeze out and create a mess. Experiment with pressure when joining the materials. Too much can create gaps, while too little won’t set properly.
Let the bond cure fully. This can take time. Rushing the process may lead to disappointing results. Also, consider temperature and humidity. Adhesives work best in certain conditions. If it’s too cold or too damp, the bond may not hold. Don't hesitate to practice on scrap materials first. This can reveal issues before you apply it to important projects.
How to Use Clear Liquid Nails for Strong Adhesive Bonds? - Tips for Achieving the Best Bonding Results
| Application Surface |
Drying Time |
Cure Time |
Ideal Temperature |
Strength Rating |
| Wood |
30 minutes |
24 hours |
60 - 80 °F |
Strong |
| Metal |
1 hour |
48 hours |
50 - 75 °F |
Medium |
| Ceramic |
2 hours |
72 hours |
65 - 85 °F |
High |
| Plastic |
30 minutes |
24 hours |
60 - 80 °F |
Medium |
| Concrete |
1 hour |
72 hours |
50 - 80 °F |
Very High |